Choose the check that fits your setup
- Check the HDMI connection and select the input that matches the connected port.
- If your laptop only shows its own screen, enable duplicate or extend output. If you use a splitter, try a direct connection.
- If the picture still won't appear, check output compatibility and try another HDMI source to help narrow down the problem.
A cable can be plugged in while your projector is listening to a different input. We'd check the connection and selected input first, because those checks address the signal path before you change the source's display settings.
The branches below follow Soundcore's projector HDMI troubleshooting (opens in a new tab). Use them for a projector setup, with your own projector's port labels and capabilities deciding which connection and resolution to use.
The cable is connected, but the picture is missing
Disconnect and reconnect the HDMI cable securely at both the source device and the projector. Check both ends, even if the projector end is the one you've been handling: a loose connection anywhere along that cable can stop the projector receiving the signal properly.
Inspect the cable for visible damage, including twisted pins, worn cable sections or disconnected connectors. Replace a cable with visible damage (opens in a new tab), because a damaged cable can prevent the signal reaching the projector.
If the cable looks intact but reseating it hasn't restored the picture, test with a different HDMI cable. Visible inspection and substitution answer different questions: the first finds apparent damage, while the second lets you check the connection using another cable.
Loose connections, damaged cables and damaged HDMI ports are all possibilities in this branch. Work through the accessible cable checks before moving to the port comparison below; a cable that looks fine still belongs in the substitution test when the problem persists.
You moved the cable to another input
Look at which HDMI input the cable actually enters, then select that input on the projector. The selected input needs to match the physical connection, so check the port label instead of choosing an input by memory.
If you move the source to another compatible HDMI input, change the projector's selected input to match (opens in a new tab). Leaving the old input selected means you're checking a different connection from the one you've just made.
Another available HDMI port on the source device is also a substitution option. Keep track of which end you're changing: switching a projector input and switching a source output are separate checks, and the projector must remain selected to the input carrying that source.
Your laptop only shows its own screen
Open the laptop's display settings and change “PC screen only” to duplicate or extend output. A laptop can use its built-in screen without sending a picture to the connected projector, so this setting tells it to provide external display output.
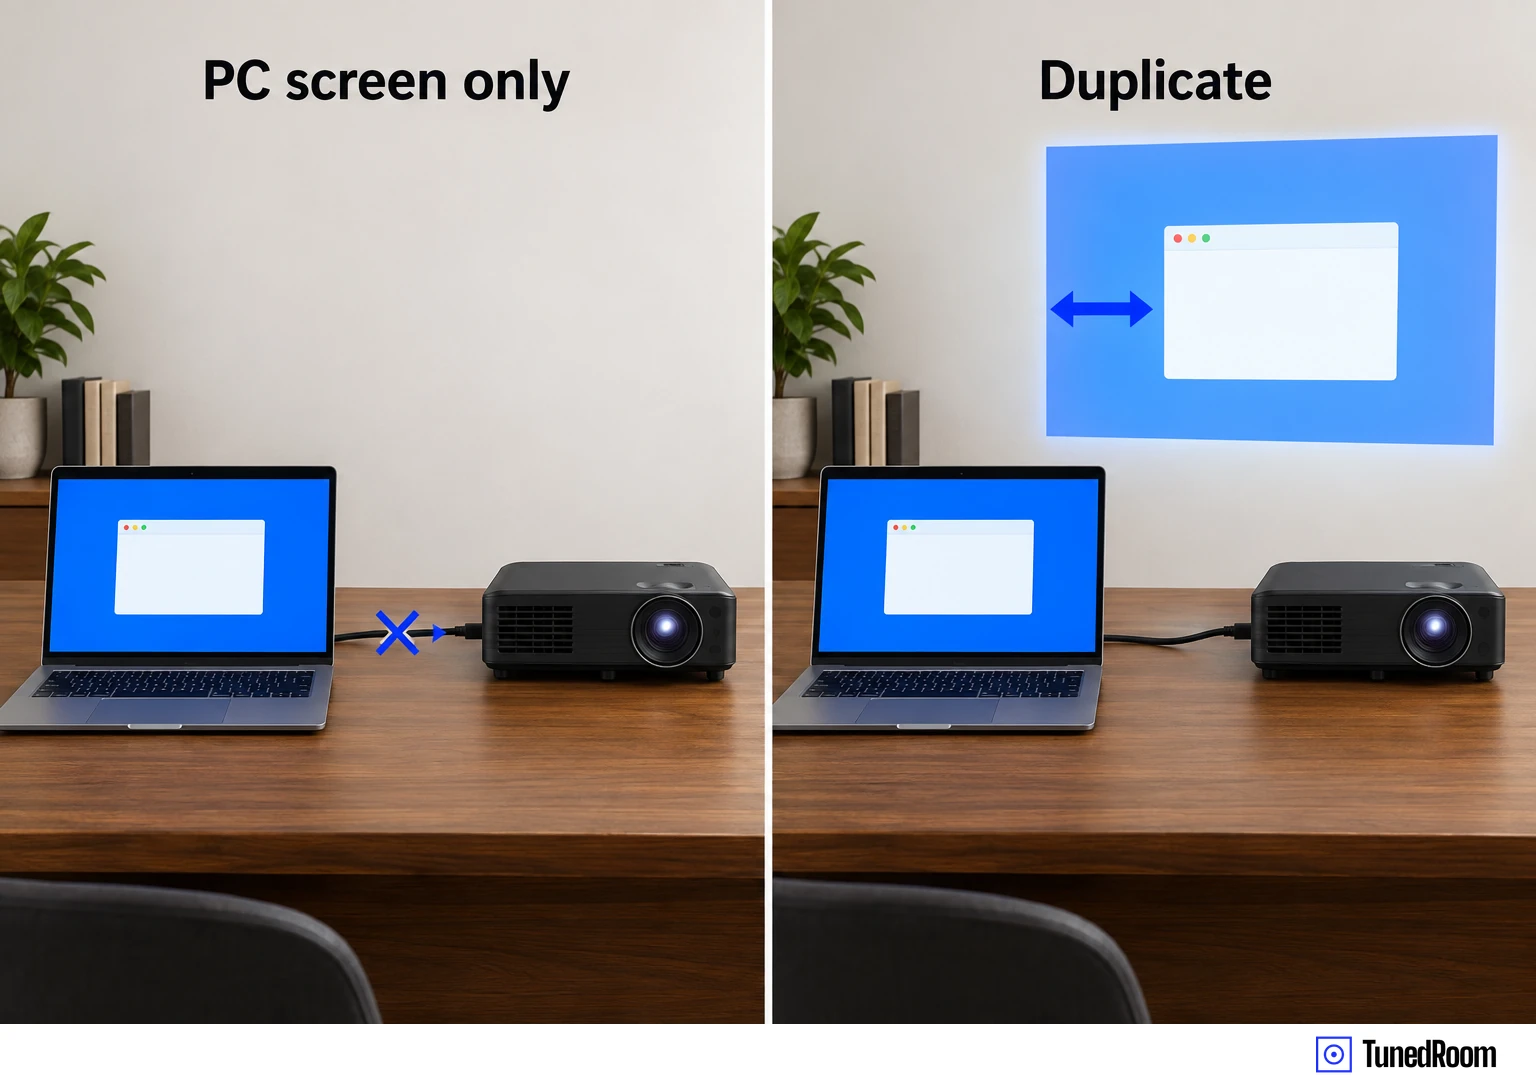
Soundcore's computer detection examples (opens in a new tab) use right-click desktop > Display Settings > Detect on Windows, and System Preferences > Displays > Detect Displays on Mac. Where your computer has those controls, use them to detect the projector.
Check the output resolution as part of this branch too. Enabling the external screen and choosing a resolution the projector supports address two separate requirements: the laptop needs to send a picture, and the projector needs to accept that picture's resolution.
A splitter sits between the source and projector
An HDMI splitter distributes one source's signal to multiple receiving devices. When one sits between your source and projector, it adds a component that can malfunction or have a compatibility problem.
Disconnect the splitter and connect the source directly to the projector (opens in a new tab) using a single HDMI cable. This takes the splitter out of the connection, letting you check the source-to-projector link without that extra component involved.
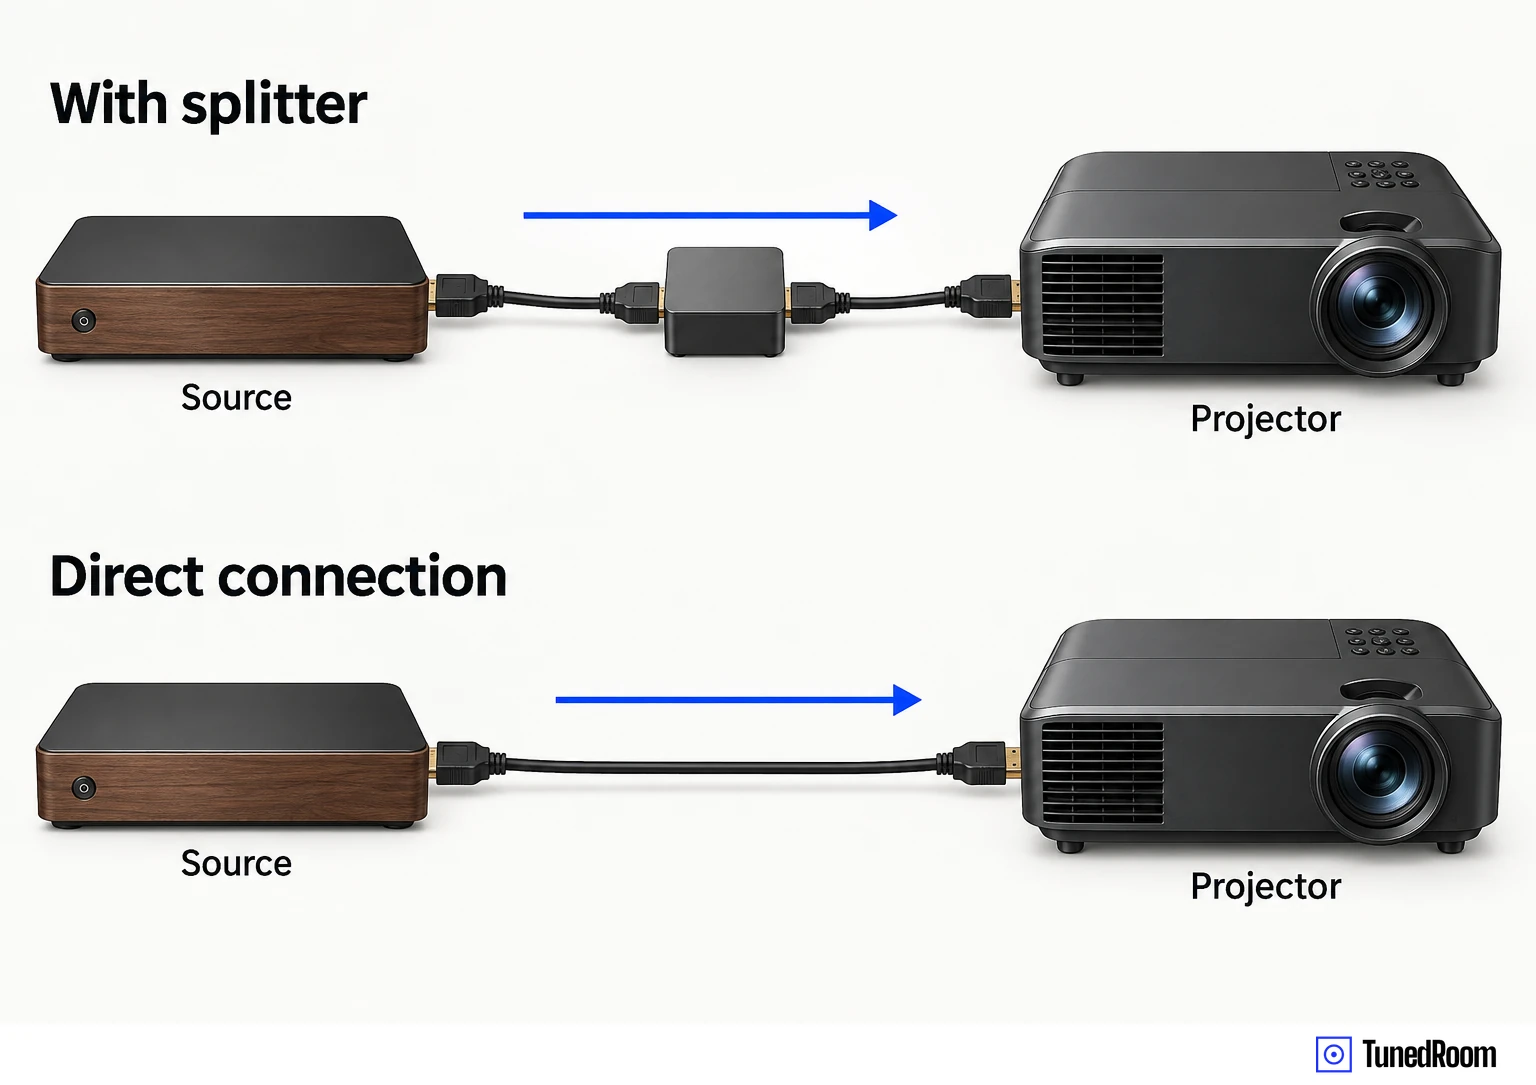
Look for the source's content on the projection. A picture through the direct connection gives you a working route that bypasses the splitter; if the no-signal message remains, continue with the source settings and compatibility checks on that direct route.
One HDMI port works and another doesn't
Compare the ports' capabilities before interpreting a different result as a hardware problem. Many projectors have HDMI inputs with different capabilities, so a source can work on one input while another lacks the resolution or protected-content support it needs.
Use the projector's actual port labels or user manual to check HDMI versions (opens in a new tab). If one port is labeled HDMI 2.0 and another HDMI 1.4, Soundcore recommends the 2.0 port for modern devices.
Soundcore describes HDMI 1, often labeled HDMI ARC or HDMI 1 (ARC), as typically supporting HDMI 2.0 or 2.1 and recommends it for the primary source. Its HDMI 2 example may instead support HDMI 1.4 and may lack 4K or HDCP 2.2 support. Those are qualified examples; choose by the capabilities listed for your projector.
Protected streaming, Blu-ray and cable TV content also require compatible HDCP support at the source and projector. A projector supporting HDCP 1.4 cannot accept the example of a source outputting HDCP 2.2 content, which can leave a black screen or no-signal message. Include that requirement when choosing an alternative input.
The source may be sending an unsupported resolution
Check the projector's supported resolution before changing the source output. An output above the projector's maximum can prevent it recognizing the signal, so the useful target is a resolution compatible with your actual projector.
When you can't see the source's settings through the projector, use a working display to adjust the output (opens in a new tab). That gives you a visible settings screen while you make the change.
- Connect the source device to a display that works, so you can see its settings.
- Lower the source's output resolution to match the projector's native resolution, checking the selected value on the working display.
- Reconnect the source to the projector and check whether your content now appears.
If your projector offers an Auto-Detect or Auto-Scan input mode, that's an alternative to try. It attempts to find a compatible resolution automatically. Use that option where available, keeping the same goal: source output that fits the projector's capabilities.
The picture still won't appear
Connect a different device with an HDMI output to the projector (opens in a new tab). This comparison helps separate trouble specific to the original source from trouble involving the projector.
If the second device displays content, you have a working projector connection with that source, and the original source's output settings and compatibility become the useful focus. If the second device also fails, the projector side remains part of the investigation.
This comparison helps narrow the problem rather than proving which component has failed. Use the result to focus on the original source or the shared projector connection, with restored displayed content as the confirmation that the connection is working.
More in this category
Keep following the signal
- Why Is HDMI Not Playing Sound? Causes and What to Change
- How to Connect Multiple Bluetooth Speakers to One Audio Source
Elsewhere on the desk